Sunday, November 30, 2014
WE'RE PREGNANT!!!
Surprise!! We're baking up a 'Small Frey'. That's right, we're pregnant!! 16 and 1/2 weeks to be exact! I'm due May 14, 2015! :) Here's our pregnancy story (the short version):
Friday, September 5th, 2014. Nothing special about it. It was just my normal long day of cleaning and working. Chad would be home in an hour or so, and it was time to switch gears. Shower then dinner. Get out my towel. Think about my monthly schedule yet again. It's almost Day 40. Longest wait ever. Took a "just in case" test 1 week before. It was spectacularly negative. Of course. Wasn't really expecting anything else. Maybe I should just take one more test though... just to be sure. So I pee on a stick. Set it down... right beside the trash can, because obviously, that's where it's about to end up as soon as it shows up negative again. Turn on the shower water and let it warm up for a minute. Glance down at the test.
Two pink lines. Two. Pink. Lines. Grab test off counter and stare at the result, with jaw on the floor. Obviously, must be wrong. Reread test. Start shaking uncontrollably. Step into shower. Possibly do normal shower procedure?? I have no recollection now of what happened in there. Mostly because as the hot water ran over me, the whole room started getting darker and darker and darker. I remember realizing I was about to pass out. (Unfortunately, this happens to me quite often when I have medical things done.) I realize I really need to get out of the shower. Step out, blindly; everything is dark. Grab towel. Wrap haphazardly around me. Walk out to bedroom. Lay down on floor. Put legs up onto the bed to elevate them. Apparently I had the clarity of mind to remember that you should elevate your legs if about to faint. Lay there half-conscious for who knows how long. Carpet is soaked.
Still shaking, but the room is starting to get brighter again. Feeling better, I stand, find my phone, and manage to select my husband's number. He answers, and voice shaking I ask, are you coming home soon? He knows something's wrong. But this isn't the first time I've called him upset. Yes, he tells me. He needs to run some work errands after he leaves the office in a few minutes, but he can come home first and then go back out. Great, I tell him. I need him to come home.
I find a picture of us at our wedding, and with a white chalk marker, I draw a little baby belly over my image. And above Chad's I write 'daddy'. At the bottom I add 'We're growing! I'm pregnant!'. I set up my camera to record. Chad gets home and I ask him to come sit down on our bed. He does, confusedly. He wants to know what's wrong. I hand him the picture and the pregnancy test. He stares at it for a moment... and then he looks up at me, joy and shock on his face and says "You're PREGNANT?!". Lots of hugging and smiling commence.
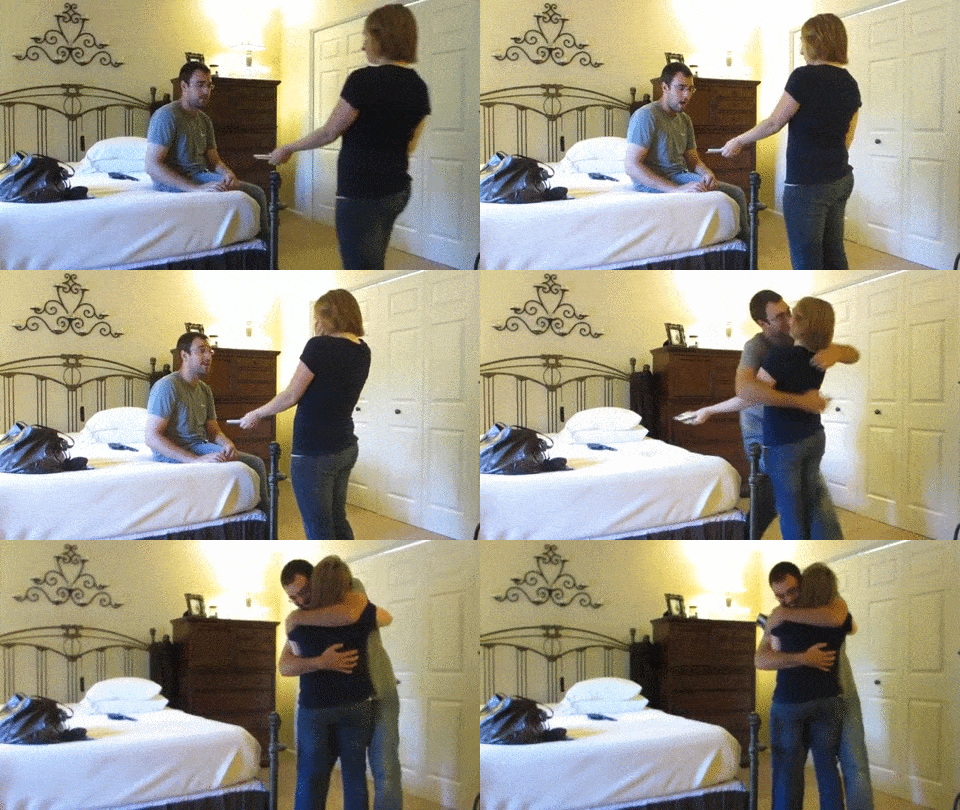
Then I took two more pregnancy tests just to be sure. Definitely pregnant.
For the first week or two after we found out, we were pretty much in a state of disbelief. Of course I was happy, but I was also: terrified, nervous, completely unsure if I could handle being pregnant for 9 months, excited, very overwhelmed, "oh gosh, what if I hate motherhood?!!?", back to ecstatic again, and overall just plain confused. There was so much emotion in those first weeks that it all ran together in one big overloaded feeling-fest. Haha!
But things have evened out since then and I'm glad to say, I am simply feeling 'ready' now. I'm feeling so excited to be a mom! I feel very content knowing that everything happened in God's perfect timing. I believe God knew I was ready even if I didn't know myself! And I'm confident now that I can do this and that I will love it!
So far, I'm not one of those happy, glowing women, who tells everyone how much they love being pregnant. I was nauseous ALL THE TIME (horribly so in the evening and overnight), and I did my fair share of hanging over the toilet... pretty much until just last week. I am just FINALLY starting to feel back to the 'normal' me again, and I'm only occasionally getting nauseous now. The food aversions were so bad that I pretty much only ate cereal for weeks on end. I am breaking out constantly. I've got acne like a teenager again... ick! I can't get comfortable anymore, no matter how I sit or lay, and I toss and turn all night long. I tell Chad probably every day, I'm so ready to hold this baby in my arms and get it out of my belly... and I'm well aware that I'm just in my 16th week and I've got more than half way to go.
But I'm also excited beyond words. I'm really starting to show now (more now than just a "oh, she looks like she's been having a little little too much to eat") and it's feeling more real and more special all the time! Chad & I are thrilled to see where this pregnancy journey takes us, and what our 'Small Frey' turns out like! Please pray for us as we make our way haphazardly into parenthood! :) And stay tuned to our blog... we'll be sure to post more updates as the pregnancy progresses!
Saturday, August 9, 2014
Homemade Taco Seasoning
In general, I'm not a Mexican food fan. I think it's mostly because I can't stand spicy foods. At all. Hate them. If it has any amount of "heat" in it, count me out. I guess my older brother took the last gene that allows you to enjoy eating spicy foods because he can eat hot peppers like candy. But me, if I look at a hot pepper directly, my eyes will start smoldering. No, I'm not exaggerating. I have something of an epic level of intolerance for all things spicy. Words like "ridiculous" and "pathetic" have been thrown around in regards to it. I always ask my family if something is spicy before I try it, and they respond, "For a normal person, not at all... for you, yes, don't eat it."
Lucky for me, my husband isn't in love with Mexican food either so I'm never forced to make/eat much of anything in that category, but we do enjoy the occasional taco salad. Most of those packets that you can buy at the store to season taco meat are a little too spicy for me, and besides those things have a bunch of questionable ingredients in them anyway. So I started making my own at home. It's completely customizable, much healthier, and much much easier than running to the store.
This is our favorite blend of spices... It has a sweetness to it and just the smallest hint of spiciness. For me, it's the "hottest" I want to go. I think it's got just about the perfect amount of spice to sprinkle over a nice cool bed of lettuce and then smother with a nice cool layer of ranch dressing (no salsa for me, that's just too risky). Hope you enjoy!
Homemade Taco Seasoning
1 tbsp Chili Powder
2 tsp Cumin
1 tsp Garlic Powder
1 tsp Paprika
1 tsp Oregano
1 tsp Onion Powder
1 tsp White Sugar
1 tsp Pepper (more or less to taste)
1 tsp Salt (more or less to taste)
(...and if you must, I suppose you could throw in some cayenne pepper or red pepper flakes... if you want it to be ruined... bleh...)
Put all the spices into a airtight container and shake or stir together until well-combined. I usually use between 1-2 tablespoons per 1/2 lb of ground beef. But you can use more or less to taste. I often double or triple or even quadruple this when I make it so I have it for a long time.
Wednesday, April 9, 2014
DIY Spring Door Wreath
(This post may contain affiliate links)
I love winter, and it's always a little bittersweet to say goodbye. This winter stuck around for a particularly long time, and while many people feel like it has worn out its welcome and are glad to see it go, I feel like I'm sending off a good friend for a long vacation. But I'm also thrilled for the warmth and light of spring to starting to show itself again. I am not a fan of the intense heat and humidity of summer, but spring (for the usually short time it lasts) is perfect and lovely. Everything turns from pale and brown to bright and green.
To celebrate the flowers, finally peaking their heads out of their beds (these hellebores are very late this year...), I made a wreath for my front door inspired by a few ideas that I'd seen on Pinterest. It was a really simple DIY project that took a minimal amount of time and cost very little. And it's perfect for all these "April Showers" we've been having so far this month. For the most part, I love rainy days... they remind me of my VERY rainy April wedding day! :)
I used a cute umbrella that I found at Target for less than $20. The best part is, I didn't do anything to it... it's still just an umbrella! So in a month or so when spring has left us, I can still use it. As an umbrella! :)
Here are a few other white umbrellas from Amazon that would make this project absolutely gorgeous! Click the images below for product information.
I looked at faux flowers from Hobby Lobby & Michaels when they were on 50% off sales, and I was very close to buying different stems at each place, but I kept changing my mind about what I wanted. The wreath that I originally saw on Pinterest used the quintessential spring flower, Tulips. I loved it and thought it was gorgeous, but I just couldn't get the color and the shape of the tulips to look right in my arrangement. I finally looked at some hydrangeas, which is a flower I actually like a lot more than tulips anyway, and I loved the striking color of the blue petals with the crisp white umbrella. But these were a little pricey for my taste, even 50% off at Hobby Lobby. This was supposed to be a cheap and easy project that I didn't need to worry about "weathering" from being outside for a few months.
Finally, by accident really, I saw some pretty hydrangea stems at Wal-mart, that were definitely much cheaper (in look and price) than the ones at Hobby Lobby, and I still really liked the color and was glad I didn't have to worry about really nice flowers getting potentially ruined from being outside.
All that this project required was flipping my umbrella upside down and arranging the hydrangeas in it. I added a little length of transparent & white-rimmed ribbon that I had left over from Christmas to tie a little bow on the front, and that was that! I really like it and it looks really cute hanging on my front door, welcoming in these rainy April days!
Happy Spring to you!!
Tuesday, March 11, 2014
DIY Entryway Bench
(Disclaimer: This post may have affiliate links.)
When Chad & I talked about redoing our basement, I knew I wanted some kind of entryway bench. I love halltrees and the cute cubbies systems that you can buy from pottery barn and other similar places, but I do NOT like the price tag. Here is one really cute bench from Pottery Barn that costs $400. AND it doesn't even include the baskets or the cushion (or the matching shelf above which is entirely seperate). The baskets and cushion together cost about another $170 (on sale). So to buy it like it's shown in the picture (not even including the shelf), I'd be dishing out more than $570. I just can't see myself spending that kind of money for a bench.
![]() |
| Potty Barn's Samantha Collection |
UPDATE! I still looooove this DIY projected we completed, but I have noticed in the three years since we built this bench, many much more affordable options have become available. If a DIY project like this is just out of your realm of comfort, check these out. In the spirit of honesty, of these benches are cheaper than what we spent to build ours! Check them out:
We had a console made for downstairs to set our ginormous new TV on because we ran into a similar problem finding one. All of them were crazy expensive and none of them were the length as we wanted or really looked like what we were hoping for. So, we decided to check out a local furniture maker, and I am SO glad we did. We had to wait a little on it because he was really busy with other projects, but he built us EXACTLY what we wanted for less money than almost anything we found in big box and local furniture stores (and actually also in really remote furniture stores that we spent hours driving to hoping to find something that would work). Life Lesson: Custom-made does not always mean overpriced. Check out ALL your options, even the ones you think may be out of your price range, before you make a decision. You may be surprised!
Anyway, I explain all that to say that we briefly considered having this furniture maker also make us an entryway system (and every other piece of furniture we ever wished we had), but we examined our priorities and decided that we just didn't want to spend the money this time around. We aren't sure how long we'll stay in this house (but it's looking like we may move sooner rather than later), so we don't want to be rash and spend money on a bunch of custom things that we can't end up working into a new place. But we definitely want to enjoy this house and make it as functional as possible for as long as we're here.
So I decided that
Here's how we did it. I found some awesome plans HERE for free that we modified to fit our space. Then we headed to Lowe's and bought a sheet of MDF and two 1x3s also made of MDF. The lumber cost us $45. (MDF is the same material that the Pottery Barn bench is mostly built out of).
Then we got our saw set up and made the necessary cuts and started assembling... this took us a few hours one weekend afternoon. The plans and pictures of other similar projects that I found on Pinterest helped us figure out exactly how to assemble the bench to our liking. Chad pre-drilled all the holes for the screws to keep the wood from splitting and countersinked the holes so the screws would be recessed into the bench and could be filled with putty to make them virtually invisible.
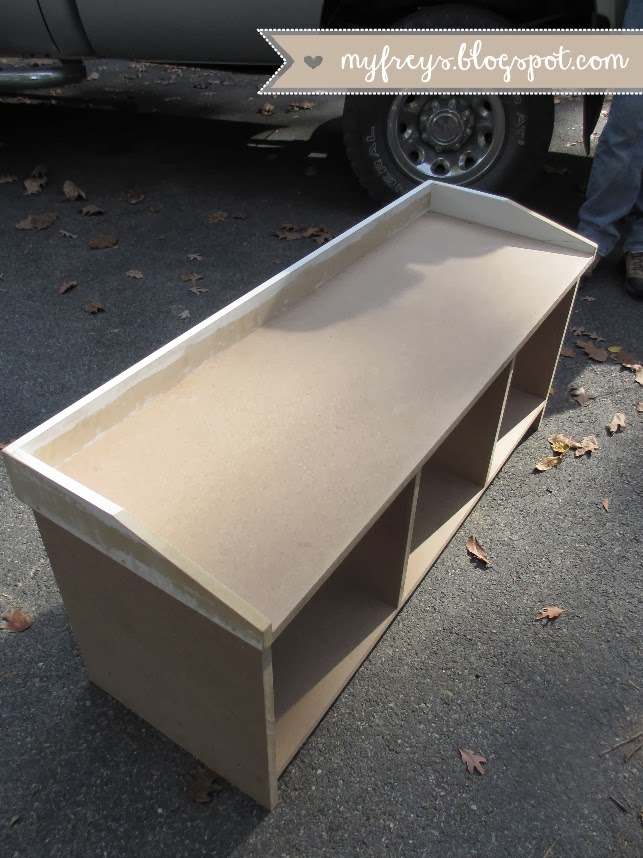
Here's what the bench looked like when before we added the trim to the bottom or the backing:
Pretty simple so far!
For the backing, I used a left over piece of wall paneling that we pulled out of our basement when we remodeled it just a few months ago. I primed it with the dreaded oil-based primer and then we attached it to the back, and also attached the 1x3 trim pieces around the bottom of the front and two sides. (...apparently I forgot to take a picture of us doing this...)
And then I painted the whole thing. Just one coat. Yep. Usually you should do two. I probably should have done two. Did I wait and take the time to do two? Nope. One was good enough for me.
Here it is:
Close up of the backing here:
So with the main bench assembled and looking pretty good by itself, I was really excited to dress it up a little!
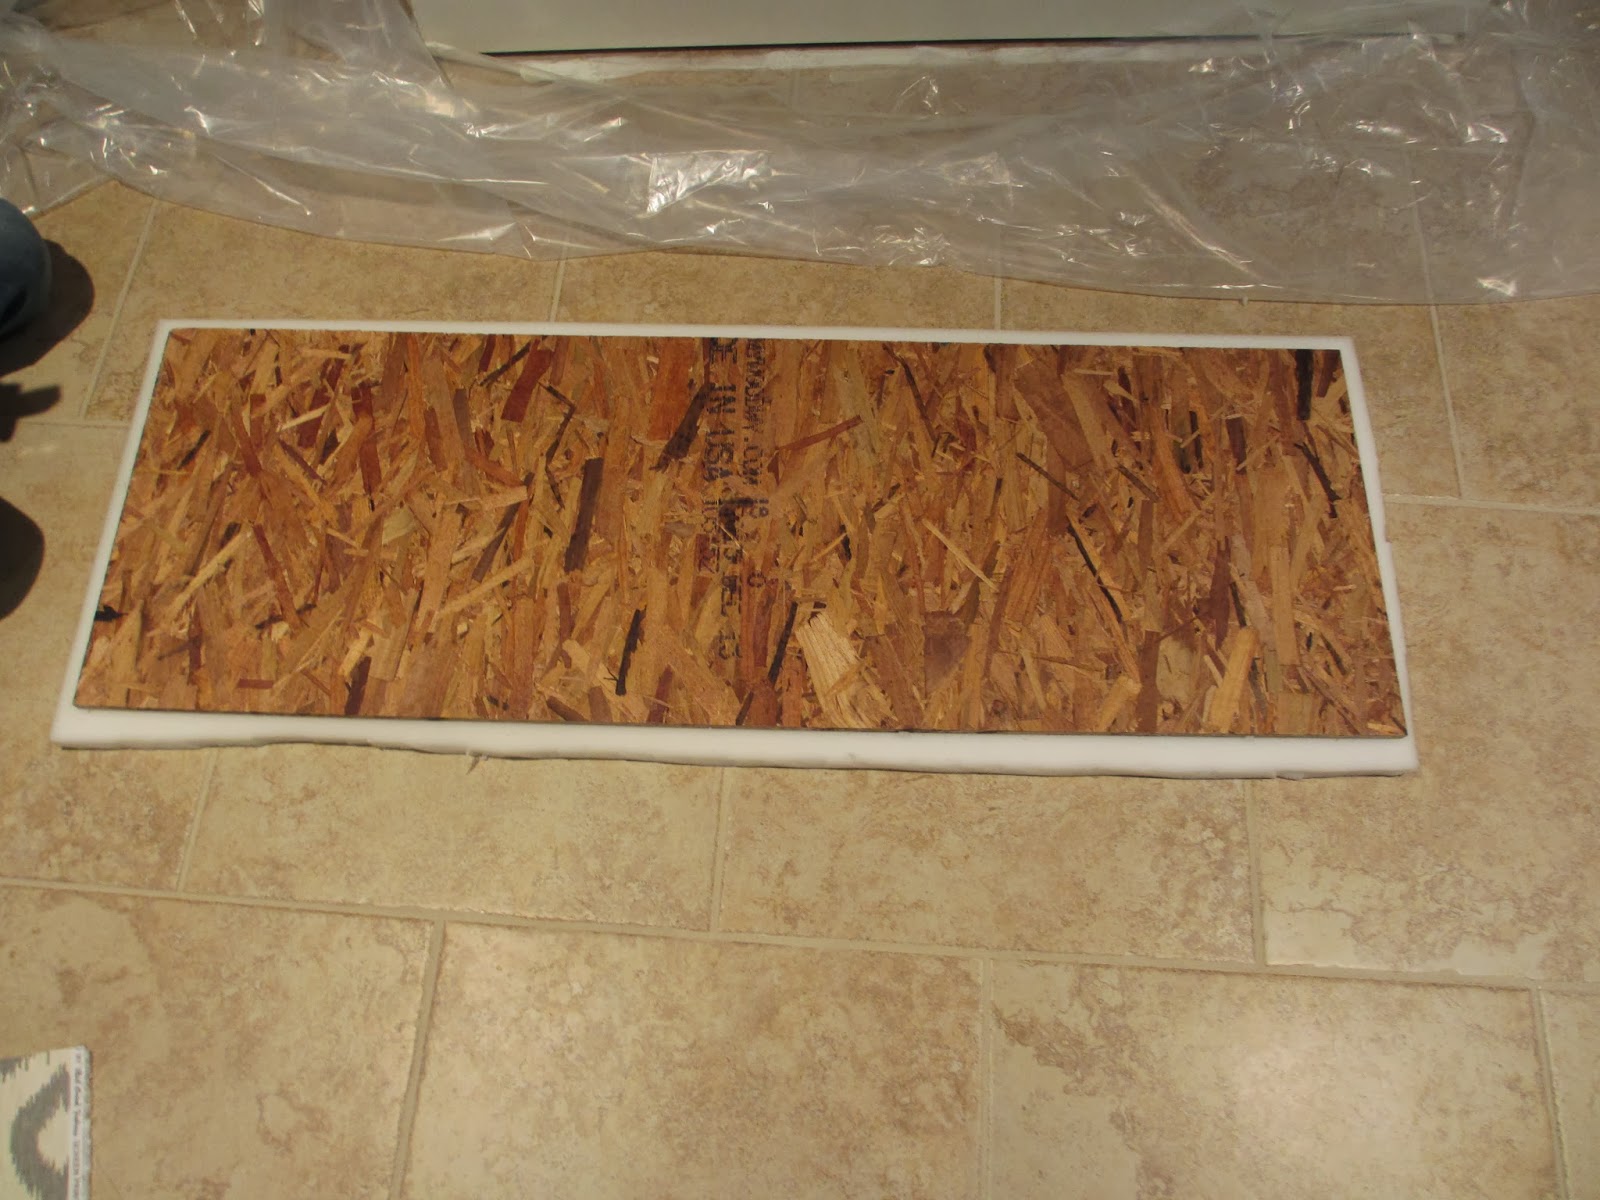
Chad and I scrounged up some plywood that was left over from some other projects and cut that to fit the top of our bench. Then we made a trip to Hobby Lobby and bought a roll of 1 inch foam that cost less than $5 for the amount I used, and a yard of some home decor fabric that we both liked which I cannot remember the price of now, but I believe it was about $8.
We did the good ole stretch and staple method to upholster the bench. First I cut the foam to fit on the plywood with just a little overhang on all sides to make it a little padded on the edges so that it wouldn't hurt anyone's legs if they plopped down on the bench.
Then we laid the fabric out on the floor upside down, placed the foam over that making sure to line it up so that the fabric print would be centered, and laid the plywood over the foam. Here Chad is painstakingly lining everything up so that it turned out perfect:
Usually, you'd want to glue the foam onto the plywood to keep it from shifting. Did I take the time to glue it? Nope. It worked out just fine anyway! I stretched the fabric while Chad stapled.
Asher guarded the left over fabric. He cracks me up. :)
Pretty cushion all done and in place:
I am really thrilled with how well this bench turned out! Not to mention, the satisfaction of knowing that you built something from scratch by yourself! And best of all, the crazy amount of money that we saved by sacrificing a few hours of time and building this ourselves! All in all we have this bench built and finished with cushion and crates in the cubbies for just over $100! That is just so much cheaper than the inspiration piece from Pottery Barn!
Asher loves it, too. He thinks we built it just so that he'd have another cozy spot to lay.
If you're wondering about the crates in the bench cubbies, I got them from Michaels for less than $20 each. I originally wanted to use baskets, similar to what was shown with the Pottery Barn version, but I ran into these crates at the craft store and they were cheaper than the ones I was considering from Target. Plus they pretty much PERFECTLY matched the color of the console that we had professionally built for out TV downstairs, and the color also tied in very nicely with the gray fabric of the bench cushion. Easy decision!
I am so happy with how it turned out! Chad and I definitely plan on building a matching shelf, too, eventually, and then it'll be a complete set and we can hang our coats!!
I made a little chart of some of the main materials and products I used on the bench, if anyone is curious where some of the things came from!
Subscribe to:
Posts (Atom)