Showing posts with label crafts. Show all posts

Tuesday, October 6, 2015

Evie's Woodland Nursery


(UPDATE!!)  I've started a new blog called Sycamore and Slate, and no longer update this one.  To see pictures of our brand new house, as we're building it, please check out our new website. Thank you for reading! - Elana

As soon as we found out we we're pregnant, one of the very first things I thought about was decorating the nursery.  But, of course, I knew that we should wait a bit until we got through the first trimester and (since I wanted the room to be gender-specific) until we were far enough along to find out if the baby was a boy or girl.  But that didn't stop me from starting to plan right away!  Or from buying a few things that would be okay for either a boy or a girl.  

I knew I wanted a forest, nature theme and there were so many adorable things every time we went to Hobby Lobby or Target that I just couldn't leave behind.  Chad will attest to that.

It was good actually that we had to wait a bit, because the room had previously been our "spare bedroom" and it was completely packed full with my old bedroom and office furniture from before we were married, mostly all of my crafting supplies, and tons of other odds and ends.  Pretty much everything that we didn't have a home for got shoved into that room.  So I spent weeks cleaning it out, throwing things away, and packing things up for storage or a yardsale.

We had painted the whole house when Chad bought it just a few years before, a neutral beige color, so I left that alone.  It worked well for the forest theme.  But I did add white vinyl birch tree decals to one of the walls as a focal point.  I made these myself with my Silhouette Studio software and my Silhouette Cameo Electronic Cutting Tool.  I couldn't be happier with how it turned out!


It took a while to get all the furniture we needed, and a lot of running all around to every furniture store within 3 hours to find the right things.  And also, lots of the good old online-shopping.  We got all our furniture, actually, from various online companies (amazon, wayfair, cymax, etc...) without being able to see them in person first. I was nervous that none of the white and ivories and tans and greys would match each other, but I ended up loving it all.  Each piece is slightly different from the others and yet they complement each other really well!


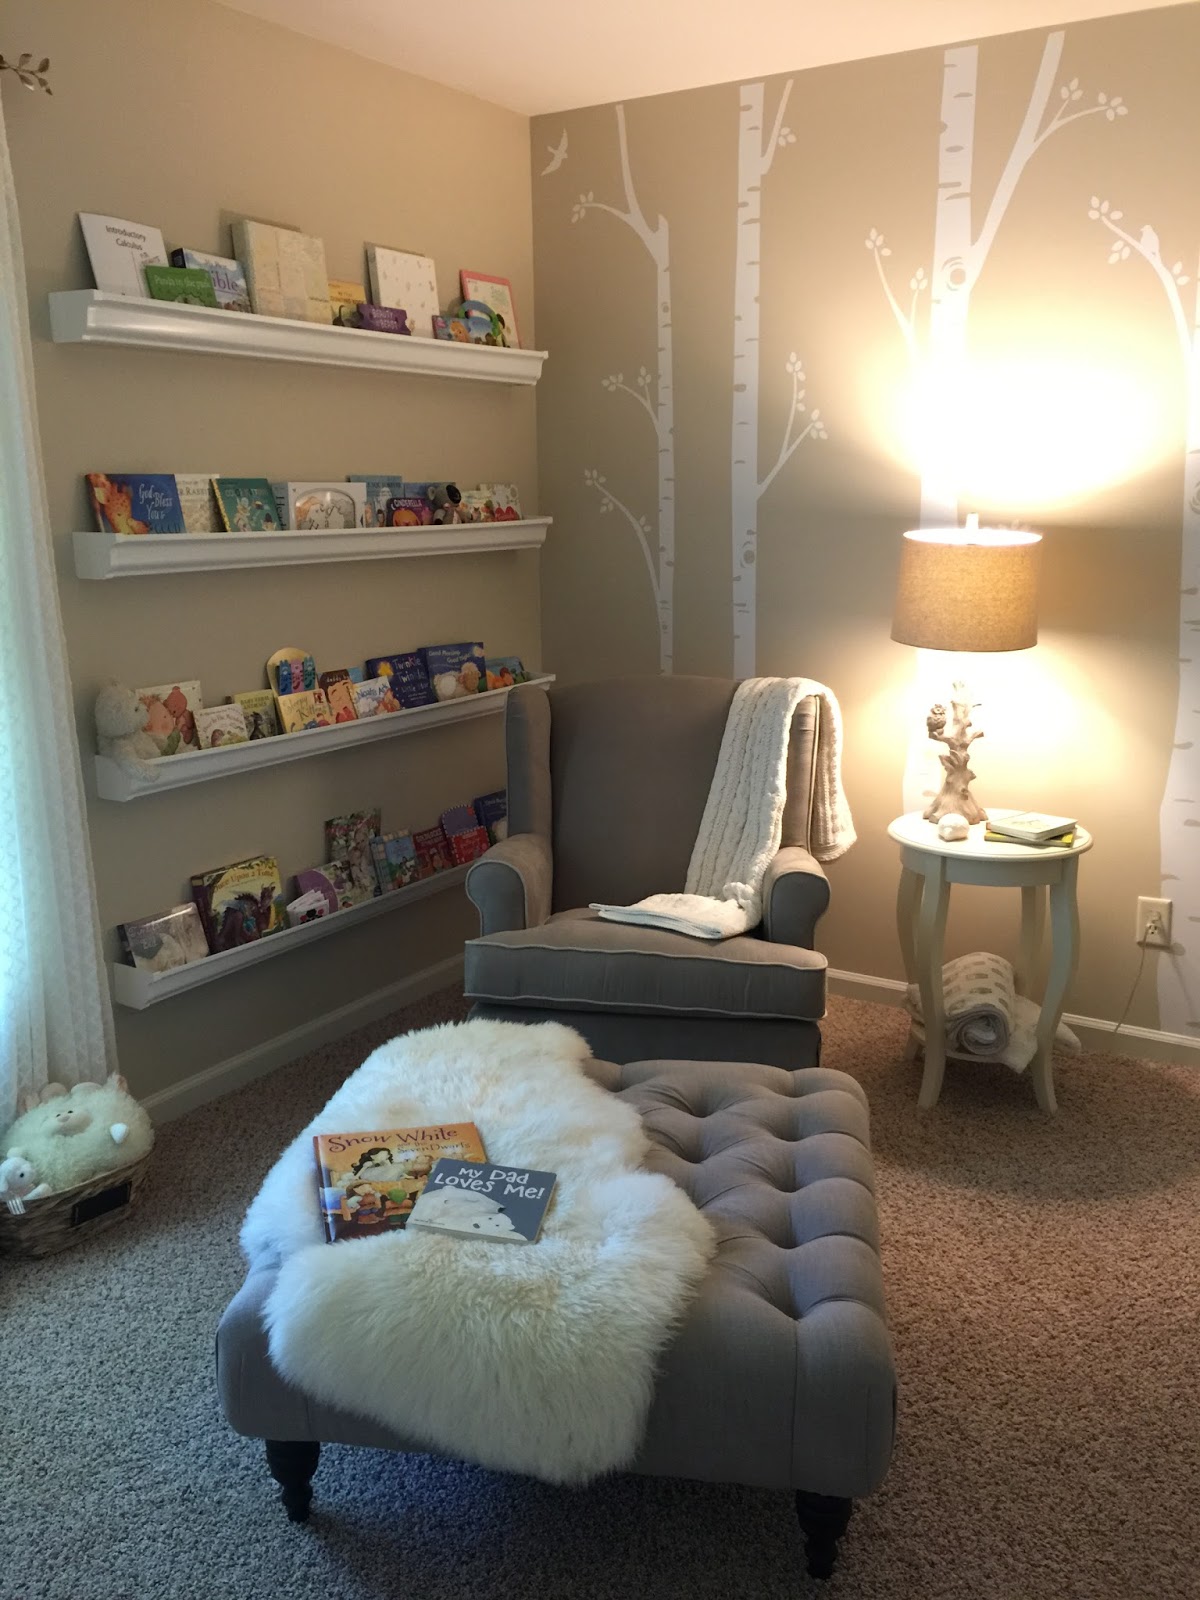
There were also a few DIY projects.  I helped Chad make these amazing gutter bookshelves. (And by help, I mean I found the idea on Pinterest and then tagged along with him to the hardware store to make sure he got the gutters I wanted).


I waited until all the furniture was in place, before I hung the pictures and wall decor so I could get the placement just right. Again, Chad did most of the actual hanging while I stood back and told him where to put everything. He will readily tell you how much he hated doing that.  Leveling all of them and getting the spacing just right was a huge pain (especially if your wife is a perfectionist).  But it was so worth it in the end! 


Many of the pictures are from Hobby Lobby including: 'Let Your Heart Sing', 'Hello Beautiful Baby Girl', 'And Baby Makes Three', 'Follow That Dream', and 'Children Only Have One Childhood'

This frame and the mini bird clothespins are from Michael's.  The quotes are Project Life journaling cards.


The 'E' was a DIY project that I made from sticks from my own back yard and a hot glue gun.


This was another DIY project that literally took maybe 3 minutes.


These gorgeous paintings are by TinyToesDesign, and they go so perfect in these frames I found at Bed Bath & Beyond.

I think it's the little details that finish the room off and make it feel cozy...  Like these sheer and shimmery curtains we got from JC Penney, hung from a shiny gold curtain rod from Lowe's.


This super soft lambskin that I have draped over Evie's ottoman.  It's so soft to put my feet up on when I rock and read to Evie.  This was a gift from Chad's parents to us back when we first were married. I love that it ended up here.


And we had to have some adorable baby toys... This soft hedgehog riding toy. I mean, come on.  Too adorable to pass up.


Also, I'm showing my owl love with some accent lamps... a little night light and a gorgeous lamp with a 3 way bulb for soft or bright lighting depending on the need.


And of course the adorable DIY projects that were gifted to Evie from loved ones.  A precious knitted lamb from Aunt Jessie and a lovely sign with one of my favorite verses from Aunt Tanya and Uncle Brandon.


How fitting is this in the closet?? I love the reminder when I'm picking out her clothes for the day.

And speaking of the closet... Chad and I got a system from Lowe's and he installed that, too! Even though Evie's closet has doors, I knew that I'd just be leaving them open most of the time because I'd need to get in there a lot for changes of clothes. I wanted something I could make kind of pretty so that it wouldn't just be a jumbled mess in there.  Plus I wanted something to allow for two hanging rods because baby clothes are tiny and it seems silly to just have one row across the top of the closet.


I love love love how the room turned out and I love spending time in there with little Evie.  The only thing I want to add yet is a mobile above the crib when Evie starts actually sleeping in here... which I think is going to be very soon! :)


Wednesday, April 9, 2014

DIY Spring Door Wreath


(This post may contain affiliate links)

I love winter, and it's always a little bittersweet to say goodbye.  This winter stuck around for a particularly long time, and while many people feel like it has worn out its welcome and are glad to see it go, I feel like I'm sending off a good friend for a long vacation.  But I'm also thrilled for the warmth and light of spring to starting to show itself again.  I am not a fan of the intense heat and humidity of summer, but spring (for the usually short time it lasts) is perfect and lovely.  Everything turns from pale and brown to bright and green.


To celebrate the flowers, finally peaking their heads out of their beds (these hellebores are very late this year...), I made a wreath for my front door inspired by a few ideas that I'd seen on Pinterest.  It was a really simple DIY project that took a minimal amount of time and cost very little.  And it's perfect for all these "April Showers" we've been having so far this month.  For the most part, I love rainy days... they remind me of my VERY rainy April wedding day! :)


I used a cute umbrella that I found at Target for less than $20.  The best part is, I didn't do anything to it... it's still just an umbrella!  So in a month or so when spring has left us, I can still use it.  As an umbrella! :)


Here are a few other white umbrellas from Amazon that would make this project absolutely gorgeous!  Click the images below for product information.


I looked at faux flowers from Hobby Lobby & Michaels when they were on 50% off sales, and I was very close to buying different stems at each place, but I kept changing my mind about what I wanted.  The wreath that I originally saw on Pinterest used the quintessential spring flower, Tulips.  I loved it and thought it was gorgeous, but I just couldn't get the color and the shape of the tulips to look right in my arrangement.  I finally looked at some hydrangeas, which is a flower I actually like a lot more than tulips anyway, and I loved the striking color of the blue petals with the crisp white umbrella.  But these were a little pricey for my taste, even 50% off at Hobby Lobby.  This was supposed to be a cheap and easy project that I didn't need to worry about "weathering" from being outside for a few months.


Finally, by accident really, I saw some pretty hydrangea stems at Wal-mart, that were definitely much cheaper (in look and price) than the ones at Hobby Lobby, and I still really liked the color and was glad I didn't have to worry about really nice flowers getting potentially ruined from being outside.


All that this project required was flipping my umbrella upside down and arranging the hydrangeas in it.  I added a little length of transparent & white-rimmed ribbon that I had left over from Christmas to tie a little bow on the front, and that was that!  I really like it and it looks really cute hanging on my front door, welcoming in these rainy April days!


Happy Spring to you!!


Tuesday, March 11, 2014

DIY Entryway Bench


(Disclaimer:  This post may have affiliate links.)

When Chad & I talked about redoing our basement, I knew I wanted some kind of entryway bench.  I love halltrees and the cute cubbies systems that you can buy from pottery barn and other similar places, but I do NOT like the price tag.  Here is one really cute bench from Pottery Barn that costs $400. AND it doesn't even include the baskets or the cushion (or the matching shelf above which is entirely seperate).  The baskets and cushion together cost about another $170 (on sale).  So to buy it like it's shown in the picture (not even including the shelf), I'd be dishing out more than $570.  I just can't see myself spending that kind of money for a bench.

Potty Barn's Samantha Collection


UPDATE! I still looooove this DIY projected we completed, but I have noticed in the three years since we built this bench, many much more affordable options have become available.  If a DIY project like this is just out of your realm of comfort, check these out.  In the spirit of honesty, of these benches are cheaper than what we spent to build ours! Check them out:


We had a console made for downstairs to set our ginormous new TV on because we ran into a similar problem finding one.  All of them were crazy expensive and none of them were the length as we wanted or really looked like what we were hoping for.  So, we decided to check out a local furniture maker, and I am SO glad we did.  We had to wait a little on it because he was really busy with other projects, but he built us EXACTLY what we wanted for less money than almost anything we found in big box and local furniture stores (and actually also in really remote furniture stores that we spent hours driving to hoping to find something that would work).  Life Lesson: Custom-made does not always mean overpriced.  Check out ALL your options, even the ones you think may be out of your price range, before you make a decision.  You may be surprised!

Anyway, I explain all that to say that we briefly considered having this furniture maker also make us an entryway system (and every other piece of furniture we ever wished we had), but we examined our priorities and decided that we just didn't want to spend the money this time around.  We aren't sure how long we'll stay in this house (but it's looking like we may move sooner rather than later), so we don't want to be rash and spend money on a bunch of custom things that we can't end up working into a new place.  But we definitely want to enjoy this house and make it as functional as possible for as long as we're here.

So I decided that we were going to build a bench Chad was going to build me a bench. :) Just kidding.  (He wished I was just kidding about the whole project at first). I am proud to say that I helped out on this project quite a lot and that after we got started, it turned out to be not-so-difficult to build.  We had a lot of fun and we feel quite accomplished now.  And Chad had a great time using many of the Christmas presents he's received over the past few years (AKA: tools).

Here's how we did it.  I found some awesome plans HERE for free that we modified to fit our space.  Then we headed to Lowe's and bought a sheet of MDF and two 1x3s also made of MDF.  The lumber cost us $45.  (MDF is the same material that the Pottery Barn bench is mostly built out of).


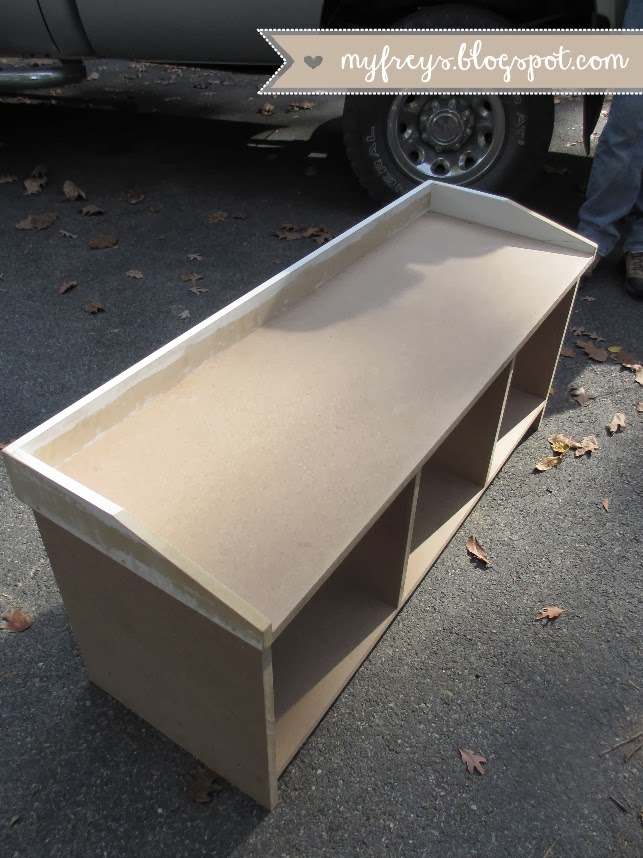
Then we got our saw set up and made the necessary cuts and started assembling... this took us a few hours one weekend afternoon.  The plans and pictures of other similar projects that I found on Pinterest helped us figure out exactly how to assemble the bench to our liking.  Chad pre-drilled all the holes for the screws to keep the wood from splitting and countersinked the holes so the screws would be recessed into the bench and could be filled with putty to make them virtually invisible.


Here's what the bench looked like when before we added the trim to the bottom or the backing:


Pretty simple so far!

For the backing, I used a left over piece of wall paneling that we pulled out of our basement when we remodeled it just a few months ago.  I primed it with the dreaded oil-based primer and then we attached it to the back, and also attached the 1x3 trim pieces around the bottom of the front and two sides. (...apparently I forgot to take a picture of us doing this...)

And then I painted the whole thing.  Just one coat.  Yep.  Usually you should do two.  I probably should have done two.  Did I wait and take the time to do two?  Nope.  One was good enough for me.

Here it is:


Close up of the backing here:


So with the main bench assembled and looking pretty good by itself, I was really excited to dress it up a little!  

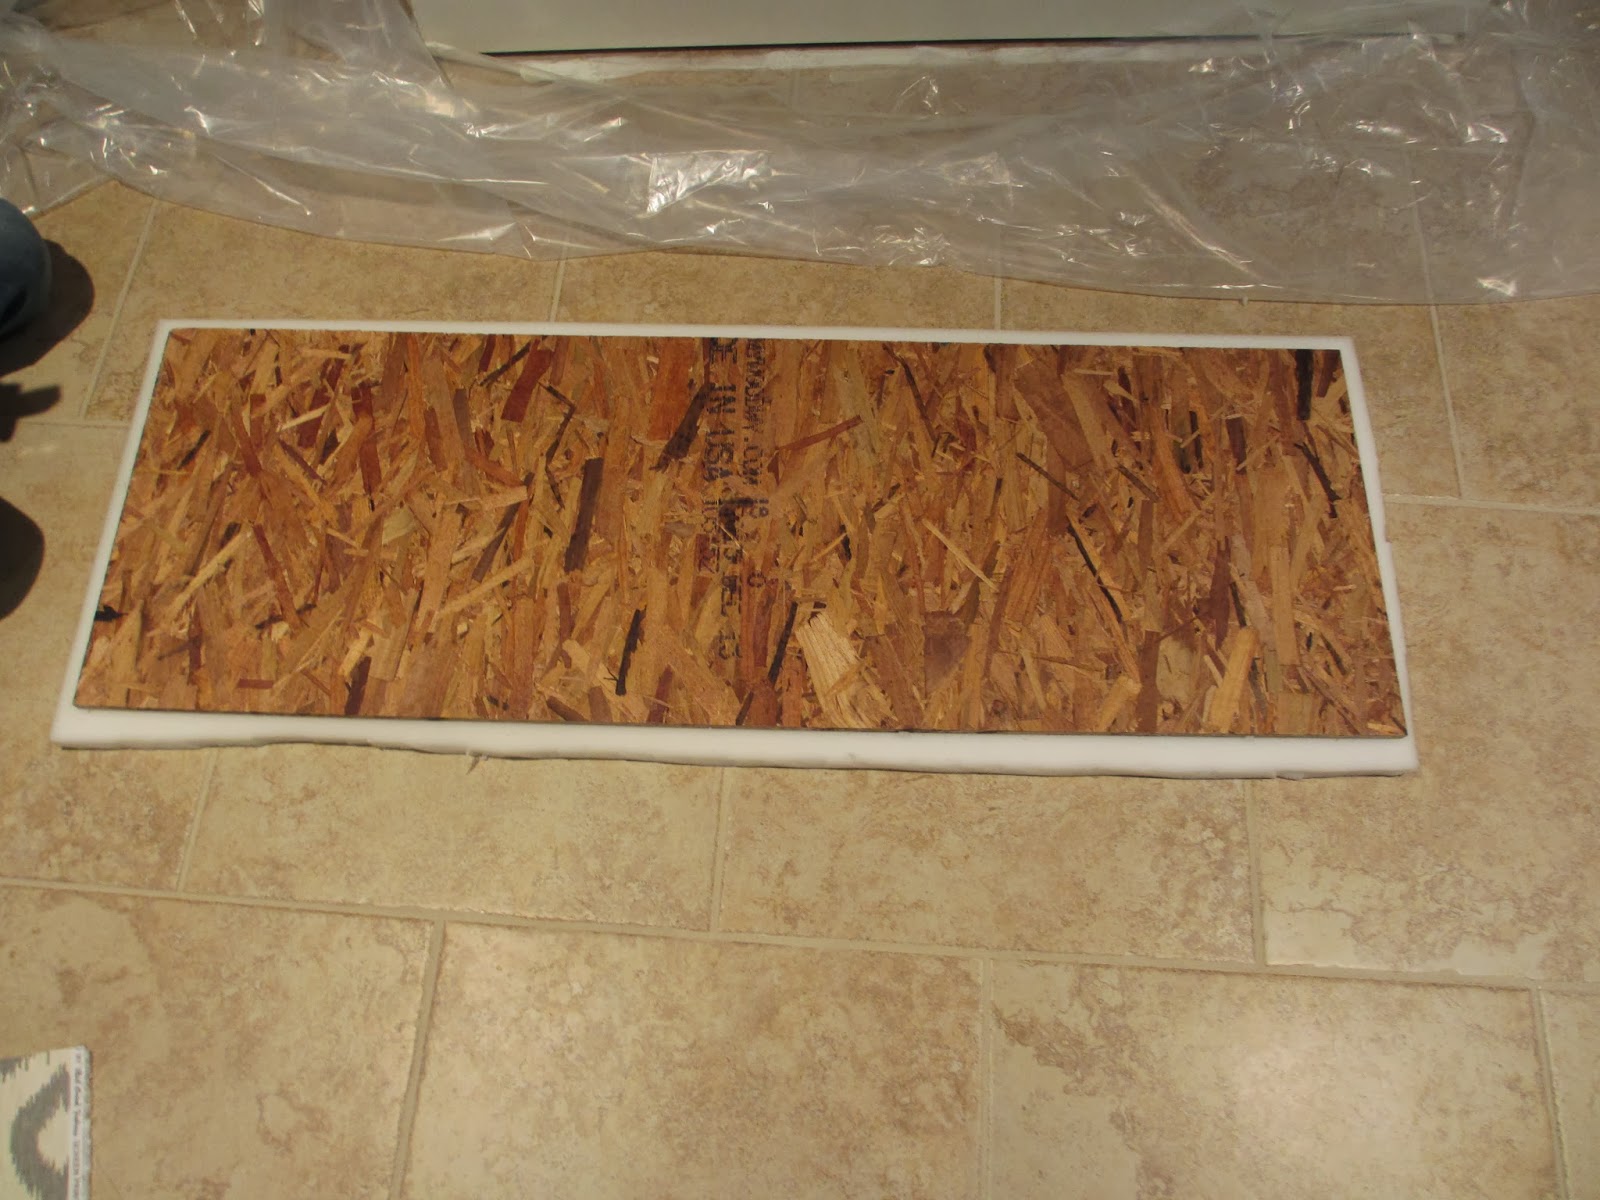
Chad and I scrounged up some plywood that was left over from some other projects and cut that to fit the top of our bench. Then we made a trip to Hobby Lobby and bought a roll of 1 inch foam that cost less than $5 for the amount I used, and a yard of some home decor fabric that we both liked which I cannot remember the price of now, but I believe it was about $8.

We did the good ole stretch and staple method to upholster the bench.  First I cut the foam to fit on the plywood with just a little overhang on all sides to make it a little padded on the edges so that it wouldn't hurt anyone's legs if they plopped down on the bench.  


Then we laid the fabric out on the floor upside down, placed the foam over that making sure to line it up so that the fabric print would be centered, and laid the plywood over the foam. Here Chad is painstakingly lining everything up so that it turned out perfect:


Usually, you'd want to glue the foam onto the plywood to keep it from shifting.  Did I take the time to glue it? Nope.  It worked out just fine anyway!  I stretched the fabric while Chad stapled.


Asher guarded the left over fabric. He cracks me up. :)


Pretty cushion all done and in place:


I am really thrilled with how well this bench turned out! Not to mention, the satisfaction of knowing that you built something from scratch by yourself!  And best of all, the crazy amount of money that we saved by sacrificing a few hours of time and building this ourselves!  All in all we have this bench built and finished with cushion and crates in the cubbies for just over $100! That is just so much cheaper than the inspiration piece from Pottery Barn!

Asher loves it, too.  He thinks we built it just so that he'd have another cozy spot to lay.


If you're wondering about the crates in the bench cubbies, I got them from Michaels for less than $20 each.  I originally wanted to use baskets, similar to what was shown with the Pottery Barn version, but I ran into these crates at the craft store and they were cheaper than the ones I was considering from Target.  Plus they pretty much PERFECTLY matched the color of the console that we had professionally built for out TV downstairs, and the color also tied in very nicely with the gray fabric of the bench cushion.  Easy decision!


I am so happy with how it turned out!  Chad and I definitely plan on building a matching shelf, too, eventually, and then it'll be a complete set and we can hang our coats!!


I made a little chart of some of the main materials and products I used on the bench, if anyone is curious where some of the things came from!